
honeywell rth2300 installation manual
The Honeywell RTH2300 is a programmable thermostat designed for compatibility with various HVAC systems, offering energy efficiency and user-friendly controls for scheduling and maintenance.
1.1 Overview of the Honeywell RTH2300 Programmable Thermostat
The Honeywell RTH2300 is a 5-2 day programmable thermostat designed for simplicity and efficiency. It features a backlit display, easy-to-use interface, and compatibility with single-stage heating and cooling systems. This thermostat allows users to set different temperatures for weekdays and weekends, optimizing energy usage. Its programmable nature helps reduce energy bills while maintaining comfort. Designed for straightforward installation, the RTH2300 is suitable for homeowners seeking a reliable and user-friendly solution to manage their HVAC systems effectively.
1.2 Key Features and Benefits
The Honeywell RTH2300 offers a range of features, including a 5-2 day programmable schedule, backlit display, and compatibility with multiple HVAC systems. It provides precise temperature control, enhancing comfort and energy efficiency. The thermostat is easy to install and use, with a user-friendly interface. Its programmable nature allows for customized temperature settings, reducing energy consumption and lowering utility bills. Additionally, it includes a filter change reminder and system setup options, ensuring optimal performance and maintenance of your heating and cooling systems.
1.3 Compatibility with Heating and Cooling Systems
The Honeywell RTH2300 is compatible with most heating and cooling systems, including gas, oil, and electric furnaces, central air conditioners, and hot water systems. It also works with heat pumps without auxiliary or backup heat. However, it is not suitable for use with heat pumps that have backup heat or multistage systems; This versatility ensures the thermostat can be installed in various residential settings, providing reliable temperature control for different types of HVAC configurations.

Pre-Installation Requirements
Ensure compatibility with your HVAC system, turn off power, and prepare tools. Verify system type and safety precautions before starting the installation process of the thermostat.
2.1 System Compatibility Check
Verify the Honeywell RTH2300’s compatibility with your HVAC system. It works with gas, oil, and electric furnaces, central ACs, heat pumps, and hot water systems. However, it is not suitable for heat pumps with backup heat or multistage systems. Check the system type and ensure it matches the thermostat’s requirements to avoid installation issues. Proper compatibility ensures efficient performance and prevents potential malfunctions.
2.2 Tools and Materials Needed
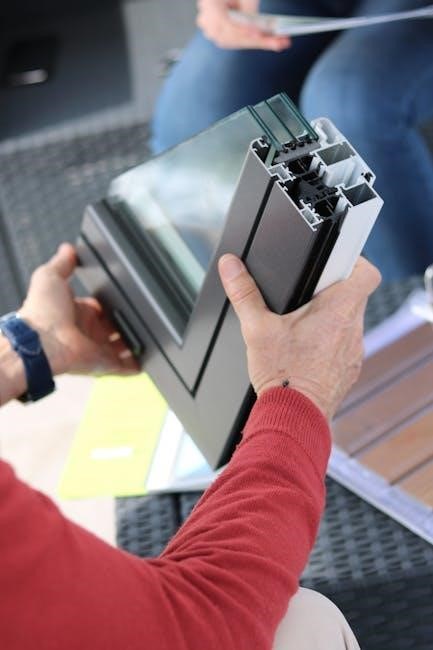
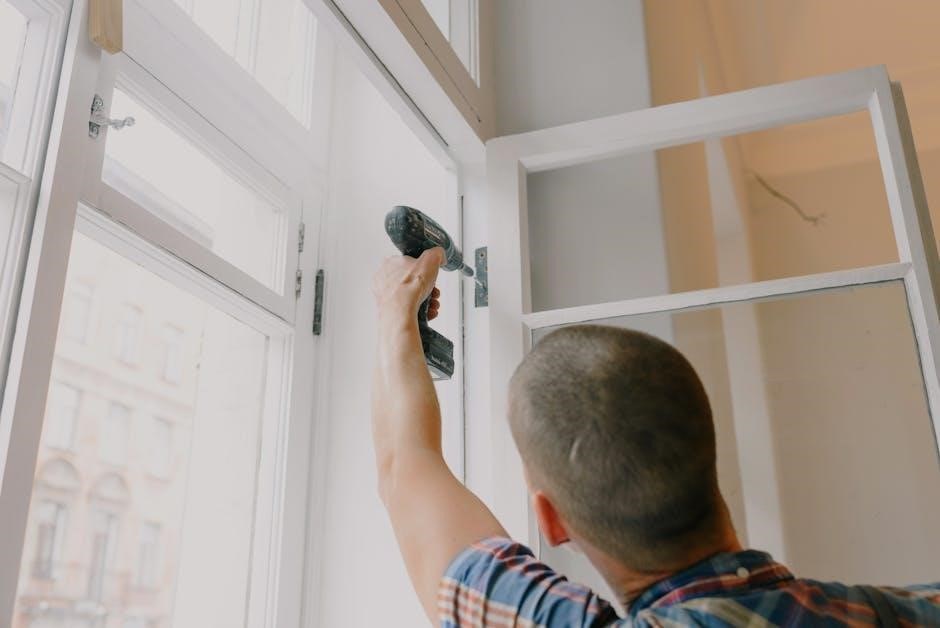
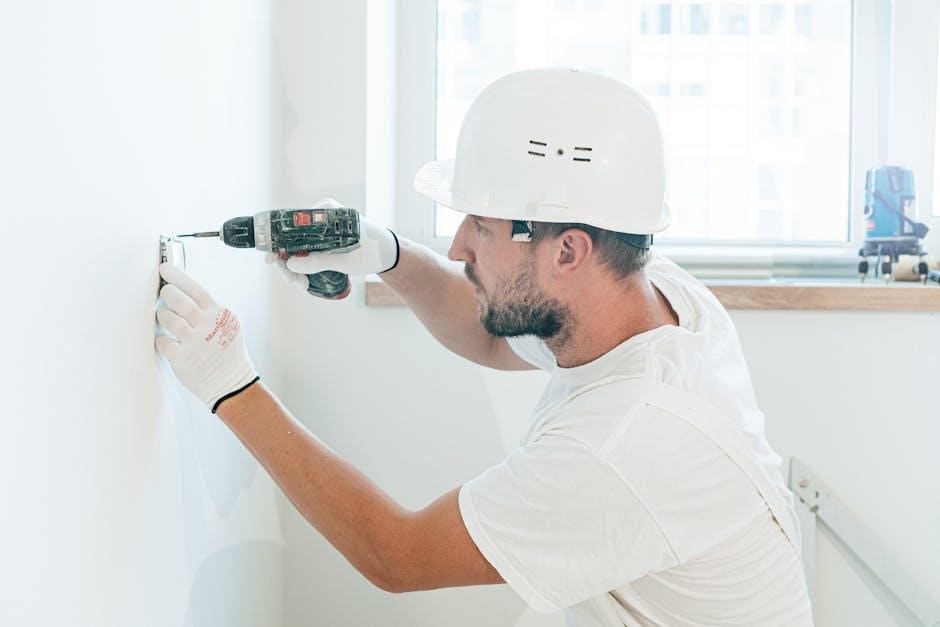
Gather the necessary tools and materials before starting the installation. You’ll need a screwdriver (both flathead and Phillips), wire labels, pliers, and a voltage tester to ensure safe handling of wires. A drill may be required for wall mounting, along with drywall anchors if needed. Additionally, keep the installation manual and quick reference guide handy for easy access. Ensure all materials are compatible with your system to guarantee a smooth installation process.
2.3 Safety Precautions
Ensure safety by turning off the power to your HVAC system at the circuit breaker or fuse box before starting the installation. Verify the power is off using a voltage tester to avoid electrical shocks or injuries. Handle wires carefully to prevent damage, and avoid touching live terminals. Wear protective gear like gloves if necessary. Follow all local electrical codes and regulations, and consult a licensed professional if you’re unsure about any step. This ensures a safe and successful installation process.
Removing the Old Thermostat
Pull the old thermostat down from the wallplate, leaving the wires connected for the new installation. Label wires for reference and consult disposal instructions for the old unit.
3.1 Turning Off Power to the HVAC System
Before removing the old thermostat, switch off the power to the HVAC system at the circuit breaker or fuse box. Verify the system is completely off by checking the thermostat display. This ensures safety during the removal process. If unsure, consult the HVAC system’s owner’s manual for specific instructions. Allow a few minutes for the system to cool down before proceeding with the thermostat removal.
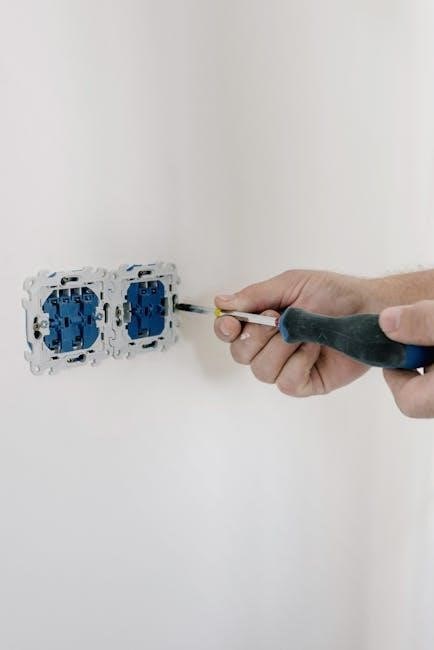
3.2 Disconnecting and Labeling Wires
Gently pull the wires free from the old thermostat. Use the supplied wire labels to identify each wire according to its terminal (e.g., R, W, Y, G). This ensures proper connection to the new thermostat. If the wires are not labeled, carefully note their positions before disconnecting. Avoid tangling the wires during removal. Proper labeling is critical for correct installation and functionality of the new thermostat. Double-check the labels to match the terminal designations on the Honeywell RTH2300.
3.3 Removing the Old Thermostat from the Wallplate
Grasp the old thermostat firmly and gently pull it away from the wallplate. Ensure the wallplate and wires remain securely attached to the wall. Do not pull or damage the wires during removal. Once the thermostat is detached, carefully set it aside for proper disposal. Leave the wallplate and wires in place for the new thermostat installation. This step ensures a smooth transition and prevents potential issues with wiring during the replacement process.

Mounting the New Thermostat
Attach the new thermostat to the wallplate, ensuring proper alignment and leveling for aesthetic appeal. Secure it firmly to complete the mounting process.
4.1 Preparing the Wallplate
Start by removing the old thermostat while leaving the wallplate intact. Carefully detach the new thermostat from its wallplate and mount the wallplate on the wall. Ensure all wires remain securely attached to their respective terminals. Properly align the wallplate with the wall and drill holes if necessary. This step ensures a smooth installation process and maintains the integrity of the wiring system for the Honeywell RTH2300 thermostat.
4.2 Leveling the Thermostat for Aesthetic Appeal
Ensure the thermostat is visually straight by using a level tool. Secure the wallplate firmly to the wall to maintain proper alignment. While leveling is primarily for appearance, it ensures the device looks professional in your home. Note that leveling does not affect the thermostat’s functionality. Proper alignment enhances the overall installation quality and user satisfaction. Use the supplied anchors or screws to finalize the positioning, ensuring stability and a polished finish for the Honeywell RTH2300 thermostat.
4.3 Securing the Wallplate to the Wall
Once the wallplate is prepared, align it with the marked holes on the wall. Insert the provided anchors into the drilled holes to ensure a sturdy base. Screw the wallplate firmly into place using the supplied screws, avoiding overtightening. Ensure the wallplate sits flush against the wall for stability. Double-check that all screws are securely fastened to prevent any movement or loosening over time. This step ensures the Honeywell RTH2300 thermostat is safely and properly mounted for reliable operation.
Wiring and Connections
Match wire labels to thermostat terminals, ensuring correct connections. Handle alternate wiring configurations as needed. Secure all wires firmly to terminals for reliable system operation and safety.
5.1 Matching Wire Labels to Thermostat Terminals
Start by turning off power to the HVAC system. Disconnect wires from the old thermostat and label them for identification. Match each labeled wire to the corresponding terminal on the Honeywell RTH2300, ensuring proper alignment with the terminal labels. If wire labels don’t match, refer to the manual or wiring diagram for guidance. Secure wires tightly to terminals to avoid loose connections. Proper matching ensures accurate system control and functionality, preventing potential issues with heating or cooling performance. Contact support if unsure about wiring configurations.
5.2 Handling Alternate Wiring Configurations
If wire labels don’t match the terminals on the Honeywell RTH2300, consult the wiring diagram in the manual. For alternate configurations, refer to page 6 for terminal connections. Ensure compatibility with your HVAC system, as this thermostat isn’t suitable for heat pumps with backup heat or multistage systems. If unsure, contact Honeywell support at 1-800-468-1502 for assistance. Proper wiring ensures system functionality and safety, avoiding potential issues with heating or cooling performance.
5.3 Connecting the Wires to the Thermostat
Match each wire to the corresponding terminal on the Honeywell RTH2300, using the labels created during disconnection. Securely insert wires into their terminals, ensuring proper fit. If labels don’t match, refer to the wiring diagram in the manual or page 6 for alternate configurations. Avoid forcing wires, as this could damage the thermostat. Once connected, double-check all wires for correct placement. Proper wiring is critical for system functionality and safety. If unsure, contact Honeywell support at 1-800-468-1502 for assistance. Incorrect wiring can lead to system malfunctions or safety hazards.
Advanced Installation Options
This section covers advanced features like system configuration, enabling the change filter reminder, and programming the thermostat for customized settings and optimal performance.
6.1 Setting Up the System Configuration
During installation, configure the Honeywell RTH2300 to match your HVAC system type. Select options like heat pump, conventional, or hot water systems. Ensure proper settings for heating and cooling stages. Adjust parameters to optimize performance, such as temperature differential and fan operation. Refer to the operating manual for detailed instructions. Proper configuration ensures efficient operation and avoids system incompatibility issues. If unsure, contact Honeywell support for assistance. This step is critical for the thermostat to function correctly with your specific HVAC setup.
6.2 Enabling the Change Filter Reminder
The Honeywell RTH2300 allows you to enable a Change Filter reminder, which alerts you when it’s time to replace your HVAC system’s air filter. This feature can be activated during the installation process by selecting the appropriate option in the system setup menu; Once enabled, the thermostat will display a “Change Filter” message when the timer expires. This reminder is optional and can be turned off if not needed. Refer to the operating manual for step-by-step guidance on configuring this feature.
6.3 Programming the Thermostat
Programming the Honeywell RTH2300 thermostat allows you to customize temperature settings for different times of the day and week. The thermostat comes pre-programmed with a default schedule, but you can adjust it to suit your preferences. To program, set the time and date first, then configure heating and cooling schedules by selecting the desired temperature for each period. You can also enable features like the “Hold” and “Run” modes for flexibility. Refer to the manual for detailed steps on programming and adjusting settings.
Initial Setup and Programming
The Honeywell RTH2300 thermostat requires initial setup, including setting the time, date, and configuring heating/cooling schedules. Follow the manual forstep-by-step guidance.
7.1 Setting the Time and Date
Setting the time and date on the Honeywell RTH2300 thermostat is essential for proper scheduling. Press the “Set” button and use the up/down arrows to adjust the time and date. Save your settings to ensure the thermostat operates according to your schedule. The thermostat is pre-programmed for energy-saving settings, but you must set the time and date accurately for all features to function correctly.
7.2 Configuring Heating and Cooling Schedules
The Honeywell RTH2300 allows you to customize heating and cooling schedules to suit your daily routine. Use the up/down arrows to navigate to the schedule settings. Select the desired program periods and set the temperature levels for each. The thermostat comes pre-programmed with energy-saving settings, but you can adjust them to match your preferences. After configuring, press “Save” to lock in your settings. Regularly review and update your schedule to ensure optimal comfort and energy efficiency throughout the year.
7.3 Adjusting Temperature Settings
Use the up and down arrows to adjust the desired temperature for heating and cooling modes. The RTH2300 allows you to set temperature levels for each program period. Temporary adjustments can be made without affecting the schedule, and the “Hold” feature lets you override the program. The thermostat ensures consistent comfort while optimizing energy use. Regularly review and adjust settings to maintain efficiency and comfort, leveraging its intuitive controls for precise temperature management.
Advanced Features and Customization
The Honeywell RTH2300 offers advanced features such as Hold and Run modes, Vacation Mode, and system customization options for enhanced control and efficiency.
8.1 Using the Hold and Run Modes
The Honeywell RTH2300 offers Hold and Run modes for flexible temperature control. The Hold mode allows temporary overrides of the programmed schedule, while the Run mode resumes normal programming. These features enable users to adjust settings based on their lifestyle, ensuring energy efficiency and comfort. By understanding and utilizing these modes effectively, homeowners can optimize their HVAC system’s performance and tailor it to their specific needs without compromising convenience or energy savings.
8.2 Setting Up the Vacation Mode
To set up Vacation Mode on the Honeywell RTH2300, navigate to the settings menu and select the ‘Vacation’ option. Choose the start and end dates for your trip. Set your preferred temperature levels for when you’re away and upon return. The thermostat will adjust the temperature before you arrive for comfort. Ensure the mode is activated and confirm that it will automatically revert to normalprogramming after the vacation period ends. This feature helps optimize energy usage while you’re away.
8.3 Understanding the System Setup Options
The Honeywell RTH2300 offers system setup options to customize your heating and cooling preferences. From the menu, you can configure settings like temperature range, fan operation, and system type. Advanced options include enabling the change filter reminder, which alerts you when it’s time to replace the air filter. These settings ensure optimal performance and efficiency, tailored to your home’s specific needs. Adjustments are made through the thermostat’s interface, providing a user-friendly experience for personalized comfort control.
Troubleshooting Common Issues
Common issues include wiring problems, display malfunctions, or system incompatibility. Resetting the thermostat or checking connections often resolves these problems. Refer to the manual for detailed solutions.
9.1 Identifying and Resolving Wiring Issues
Wiring issues can cause display malfunctions or system incompatibility. Start by ensuring all wires are securely connected to the correct terminals, matching the labels from the old thermostat. If wires are mislabeled, refer to the installation manual or Honeywell’s support website for guidance. Loose connections or incorrect terminal assignments are common problems. Resetting the thermostat or rechecking the wiring configuration often resolves these issues. For complex setups, contact Honeywell support for assistance.
9.2 Addressing Display or Functionality Problems
If the display is unresponsive or shows incorrect information, start by resetting the thermostat. Ensure the power to the HVAC system is off before resetting. Check for loose wire connections or incorrect terminal assignments. If the “Change Filter” reminder flashes, refer to the manual to disable or reset it. For persistent issues, consult the troubleshooting section or contact Honeywell support. If the display remains dark, verify the power supply and circuit connections. Advanced functionality issues may require professional assistance.
9.3 Resetting the Thermostat
To reset the Honeywell RTH2300, remove the batteries and press the reset button located on the back of the thermostat. Hold the button for 5-10 seconds to restore factory settings. Replace the batteries and ensure the thermostat is properly powered. After resetting, reconfigure the system setup, time, and temperature settings. If issues persist, consult the manual or contact Honeywell support for further assistance. Resetting is useful for troubleshooting or preparing for replacement.
Maintenance and Upkeep
Regular maintenance ensures optimal performance. Clean the thermostat, replace batteries as needed, and monitor system operation to maintain efficiency and extend lifespan.
10;1 Cleaning the Thermostat
Regular cleaning ensures optimal performance. Turn off power to the HVAC system. Gently wipe the thermostat’s display and exterior with a soft, dry cloth. For tougher dirt, lightly dampen the cloth but avoid liquids contacting internal components. Never use harsh chemicals or abrasive cleaners, as they may damage the device. Check for dust buildup around buttons or vents and clean as needed. Regular maintenance helps maintain accuracy and extends the thermostat’s lifespan.
10.2 Replacing Batteries
To replace the batteries, first, ensure the HVAC system is powered off. Locate the battery compartment, typically at the back or bottom of the thermostat. Remove the old batteries and dispose of them properly. Insert new AA alkaline batteries, following the polarity indicators. Close the compartment securely. Restore power and check the thermostat’s display to ensure it functions correctly. Replace batteries annually or when the low-battery indicator appears to maintain uninterrupted operation and accuracy.
10.3 Monitoring System Performance
Regularly monitor the Honeywell RTH2300’s performance by checking the system’s heating and cooling cycles. Ensure the thermostat accurately maintains the set temperatures and schedules. Review energy usage patterns to optimize settings for efficiency. Check for consistent operation and adjust configurations if necessary. Address any unusual behavior promptly to prevent system issues. This proactive approach ensures reliable performance, energy savings, and extends the lifespan of both the thermostat and HVAC system.
Warranty and Support Information
Honeywell offers a one-year warranty for the RTH2300, covering defects in workmanship and materials. Contact Honeywell support at 1-800-468-1502 for assistance or visit their official website.
11.1 Understanding the Warranty Terms
The Honeywell RTH2300 thermostat is covered by a one-year limited warranty starting from the purchase date. This warranty covers defects in materials and workmanship under normal use. The warranty excludes batteries and issues caused by improper installation or misuse. For detailed terms and conditions, refer to the official Honeywell website or contact their customer support team directly. Proper registration and adherence to installation guidelines are recommended to ensure warranty coverage remains valid.
11.2 Contacting Honeywell Support
For assistance with your Honeywell RTH2300, contact customer support at 1-800-468-1502 or visit honeywellhome.com/support. This resource offers troubleshooting guides, installation manuals, and warranty information. You can also access online manuals and FAQs to address common issues or seek replacement information. Representatives are available to help with wiring, programming, and system setup questions, ensuring a smooth experience with your thermostat.
11.3 Accessing Online Resources and Manuals
Visit Honeywell Home’s official website to access comprehensive resources for the RTH2300 thermostat. Download the PDF installation manual and operating guide for detailed instructions. The site also offers troubleshooting tips, FAQs, and warranty details. Additionally, find video tutorials and user guides to help with installation, programming, and maintenance. For further assistance, explore the support section, which includes advanced setup options and system configuration guides to ensure optimal performance of your thermostat.

Disposal and Recycling Instructions
Contact local waste management for proper disposal and recycling guidelines. The RTH2300 does not contain mercury, ensuring environmentally safe disposal. Follow regional regulations carefully.
12.1 Proper Disposal of the Old Thermostat
Dispose of the old thermostat responsibly by following local waste management guidelines. Remove batteries and ensure the device is handled safely. The Honeywell RTH2300 does not contain mercury, making it environmentally safer. Avoid improper disposal methods like landfilling. Recycle the thermostat through authorized electronic waste centers or participating retailers. Check with local authorities for designated facilities. Proper disposal helps protect the environment and complies with regulations. Always prioritize eco-friendly disposal options for electronic devices like thermostats.
12.2 Recycling Guidelines
Recycle your old Honeywell RTH2300 thermostat through authorized electronic waste facilities. Remove batteries and any detachable components. Check with local recycling centers for specific guidelines. Many communities offer e-waste collection events or drop-off locations. Ensure the thermostat is handled by facilities that specialize in electronic waste to prevent environmental harm. Proper recycling helps conserve resources and reduces landfill waste. Contact your local waste management authority for detailed instructions and nearby recycling options.